这次使用 antd 和 TypeScript 实践一个简单 todolist, 作为简单的练手 Demo。这次的代码中暂时还没有实现数据持久化,状态管理等基础功能,只是把页面上能够看到的功能实现了。因为后续我可能会结合这个 Demo 尝试其他的数据流管理方案。
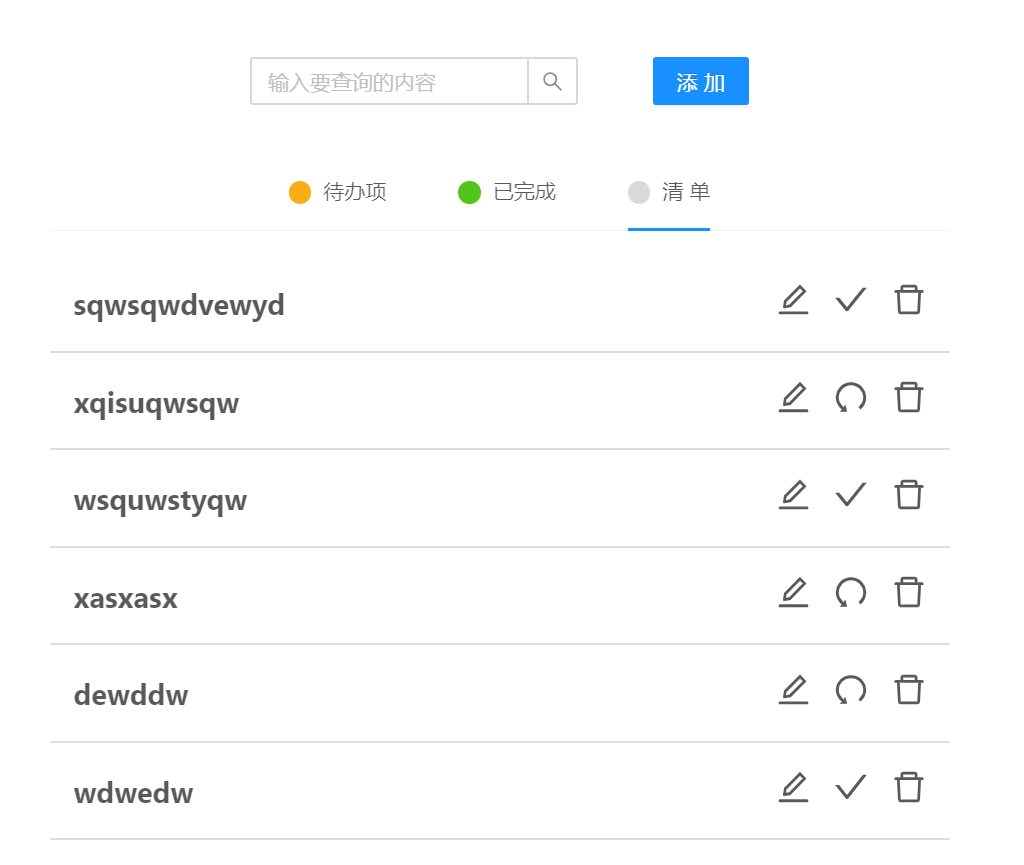
页面长这样,响应 pc 端,移动端:
 pc端页面展示
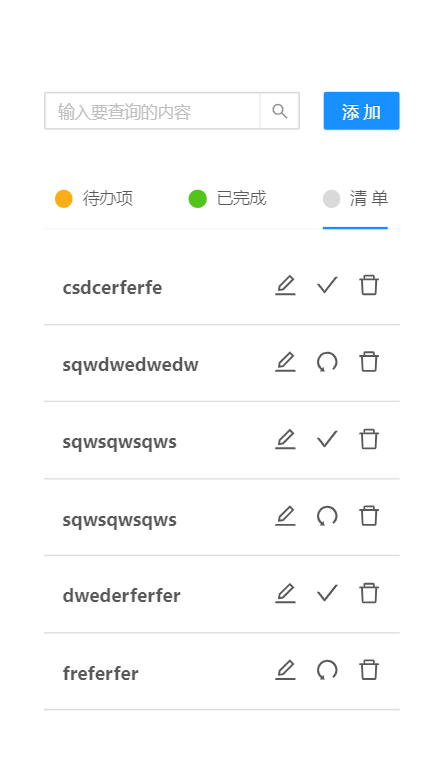
移动端页面展示
页面上有一个搜索框,过滤列表项。点击添加按钮,弹出会话框,添加列表数据。下面是三个标签选项,点击不同的标签显示不同的列表内容。列表中每一项中的三个图标分别实现的是编辑数据,修改完成状态和删除这一项的功能。
这个 todolist 实例只实现了 Todo,ModalForm(对话框),TodoList(标签选项下的列表) 组件。ModalForm,TodoList 是 Todo 的子组件。这三个组件就足够完成上述的功能了。
定义数据模型
1
2
3
4
5
|
export interface ITodo {
  id: number;
  text: string;
  done: boolean;
}
|
状态提升
由于没有引入 redux 状态管理库,为了方便组件间的数据传递,一个比较好的做法是将多个组件需要共享的状态提升到它们最近的父组件上(状态提升)。这里的父组件是 Todo 组件。
需要共享的状态有:
-
1.编辑 TodoList 组件中的 todo 时,需要让对话框显示(showModal)
-
2.编辑 TodoList 组件中的 todo 时,弹出的对话框需要获得 todo.id(todoId)
-
3.根据弹出对话框的位置,决定对话框的标题(modalTitle)
先在 Todo 组件中定义需要共享的数据字段:
1
2
3
4
|
// Todo.ts
const [showModal, setShowModal] = useState(false);
const [todoId, setTodoId] = useState(1);
const [modalTitle, setModalTitle] = useState("");
|
弹出的对话框可能是添加或编辑 todo:
1
2
3
4
|
export enum ModalType {
  Edit = "EDIT",
  Add = "ADD",
}
|
根据弹出对话框的位置决定对话框标题:
 1
 2
 3
 4
 5
 6
 7
 8
 9
10
11
12
|
// Todo.ts

const onShowModal = (type: ModalType, id?: number) => {
  if (type === ModalType.Add) {
    setModalTitle("添加任务");
  }
  if (type === ModalType.Edit) {
    setModalTitle("编辑任务");
    setTodoId(id!); //记录 TodoList 组件传递的 todoId
  }
  setShowModal(true);
};
|
如果是在 Todo 组件的添加按钮:
1
2
3
4
5
6
7
8
9
|
//Todo.ts

<Button
  type="primary"
  className={styles.newTodo}
  onClick={() => onShowModal(ModalType.Add)}
>
  添加
</Button>
|
在 Todo 组件点击添加按钮时,显示对话框组件,提交表单时用内部实现的 itemId 作为 todo.id:
 1
 2
 3
 4
 5
 6
 7
 8
 9
10
11
12
13
14
15
16
17
18
|
// ModalForm.ts

const ModalForm: FC<IModalFormProps> = (props) => {

    const { visible, onClose, addTodo, modalTitle } = props;

    const [itemId, setItemId] = useState(1);
    const [form] = Form.useForm();

    const onFinish = () => {
        const text: string = form.getFieldValue('content').trim();
        if (modalTitle === '添加任务') {
            addTodo(itemId, text, false);
            setItemId(itemId => itemId + 1);
        }
        form.setFieldsValue({ content: '' });
        onClose();
    };
|
在 ts 中需要用 interface 声明父组件传过来的 props 的类型。
1
2
3
4
5
6
7
8
|
// ModalForm.ts

interface IModalFormProps {
  visible: boolean;
  modalTitle: string;
  onClose: () => void;
  addTodo: (id: number, text: string, flag: boolean) => void;
}
|
如果是在 TodoList 中的编辑按钮:Todo 组件将 onShowModal 方法传递给 TodoList 子组件,TodoList 就能让对话框组件显示并传递 todoId 给 Todo 组件:
1
2
3
4
5
6
|
// TodoList.ts

<EditOutlined
  className={styles.icon}
  onClick={() => onShowModal(ModalType.Edit, todo.id)}
/>
|
在弹出编辑对话框之前,Todo 组件将已经获取到 todoId 传递给对话框组件:
 1
 2
 3
 4
 5
 6
 7
 8
 9
10
|
// Todo.ts

<ModalForm
  modalTitle={modalTitle}
  todoId={todoId}
  visible={showModal}
  onClose={onClose}
  addTodo={addTodo}
  updateText={updateText}
/>
|
得到 todoId 就能在对话框提交时更新 todo 了,对话框组件中完善提交表单方法:
 1
 2
 3
 4
 5
 6
 7
 8
 9
10
11
12
13
14
15
16
|
// ModalForm.ts

const { visible, onClose, addTodo, modalTitle, todoId, updateText } = props;

const onFinish = () => {
  const text: string = form.getFieldValue("content").trim();
  if (modalTitle === "添加任务") {
    addTodo(itemId, text, false);
    setItemId((itemId) => itemId + 1);
  }
  if (modalTitle === "编辑任务") {
    updateText(todoId, text);
  }
  form.setFieldsValue({ content: "" });
  onClose();
};
|
列表的增删改查
先在 Todo 组件中定义列表数据状态:
1
2
3
|
//Todo.ts

const [lists, setlists] = useState<ITodo[]>([]);
|
接下来实现列表的增删改查:
 1
 2
 3
 4
 5
 6
 7
 8
 9
10
11
12
13
14
15
16
17
18
19
20
21
22
23
24
25
26
27
28
29
30
31
32
33
34
35
36
37
38
|
// Todo.ts

const addTodo = (id: number, text: string, done: boolean) => {
  const Item = { id, text, done };
  setlists([Item, ...lists]);
  message.success("新增成功");
};

const deleteTodo = (id: number) => {
  const newlists = lists.filter((i) => i.id !== id);
  setlists([...newlists]);
  message.success("删除成功");
};

const toggleDone = (id: number) => {
  const newlists = lists.map((i) =>
    i.id === id
      ? {
          ...i,
          done: !i.done,
        }
      : i
  );
  setlists([...newlists]);
};

const updateText = (id: number, text: string) => {
  const newlists = lists.map((i) =>
    i.id === id
      ? {
          ...i,
          text,
        }
      : i
  );
  setlists([...newlists]);
  message.success("编辑成功");
};
|
代办项,已完成,清单三个标签过滤列表:
1
2
3
4
|
// Todo.ts

const todoList = lists.filter((item) => !item.done);
const doneList = lists.filter((item) => item.done);
|
实现搜索功能
先在 Todo 组件中定义搜索数据状态:
1
2
3
|
//Todo.ts

const [searchText, setSearchText] = useState("");
|
实现按搜索字段过滤数据的方法:
 1
 2
 3
 4
 5
 6
 7
 8
 9
10
|
// Todo.ts

const getFilter = (lists: ITodo[], searchText: string) => {
  if (searchText.trim() !== "") {
    return lists.filter((todo) =>
      todo.text.toLowerCase().includes(searchText.toLowerCase())
    );
  }
  return lists;
};
|
Todo 组件将列表数据先用 getFilter 方法过滤再传递给 TodoList 子组件:
 1
 2
 3
 4
 5
 6
 7
 8
 9
10
11
12
13
|
//Todo.ts

<Tabs defaultActiveKey="1" size={"large"}>
  <TabPane tab={<Badge status="warning" text="待办项" />} key="1">
    <TodoList
      lists={getFilter(todoList, searchText)}
      updateText={updateText}
      toggleDone={toggleDone}
      deleteTodo={deleteTodo}
      onShowModal={onShowModal}
    />
  </TabPane>
</Tabs>
|
上面是待办项列表的数据传递,如果是已完成或清单组件,只需将 getFilter 的第一个参数替换为 doneList 或 lists,所有功能就完成了。
续:发现了一个状态管理库 Easy Peasy
, 个人感觉比 redux 简洁。这里有一个 todolist
例子。
附:源码地址